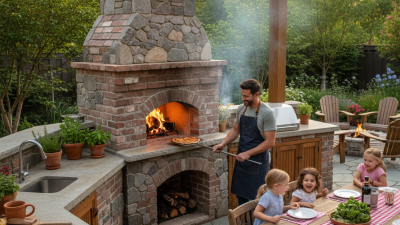
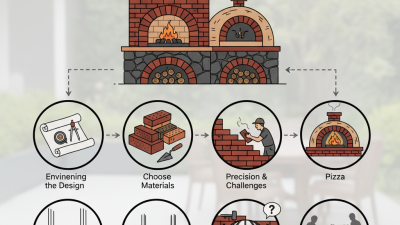
A backyard pizza oven fireplace combines two familiar outdoor features: a wood-fired pizza oven and a fireplace. It creates a dedicated cooking space while adding warmth and visual character to a patio or garden. The oven usually includes a heat-resistant dome, insulated cooking floor, chimney, and surrounding masonry. The fireplace may share the same structure, but its design depends on ventilation and local building requirements. It is more than a decorative brick feature.
In practical use, the oven reaches high temperatures for baking crisp pizza, roasting vegetables, or heating bread. Experienced installers focus on insulation, smoke movement, drainage, and safe clearances. A poorly designed chimney can push smoke toward seating areas. Weak insulation can waste fuel and damage surrounding materials. Small details matter. Very much.
The phrase backyard pizza oven fireplace can describe several layouts. Some models place the oven above a traditional firebox. Others use one chamber for cooking and another for open flames. Homeowners should compare fuel types, maintenance needs, construction materials, and professional installation advice before choosing a design. Firebrick, concrete, stone, and stainless steel each behave differently under repeated heat. A beautiful structure may still cook unevenly. That deserves honest attention.
This guide explains how these systems work, where they fit best, and what careful planning involves. It also considers limitations, because outdoor cooking is not always effortless. Weather, wood quality, cleaning, and neighborhood smoke concerns can change the experience. Reliable results come from sound design, responsible operation, and realistic expectations. Romance helps, but engineering matters more.
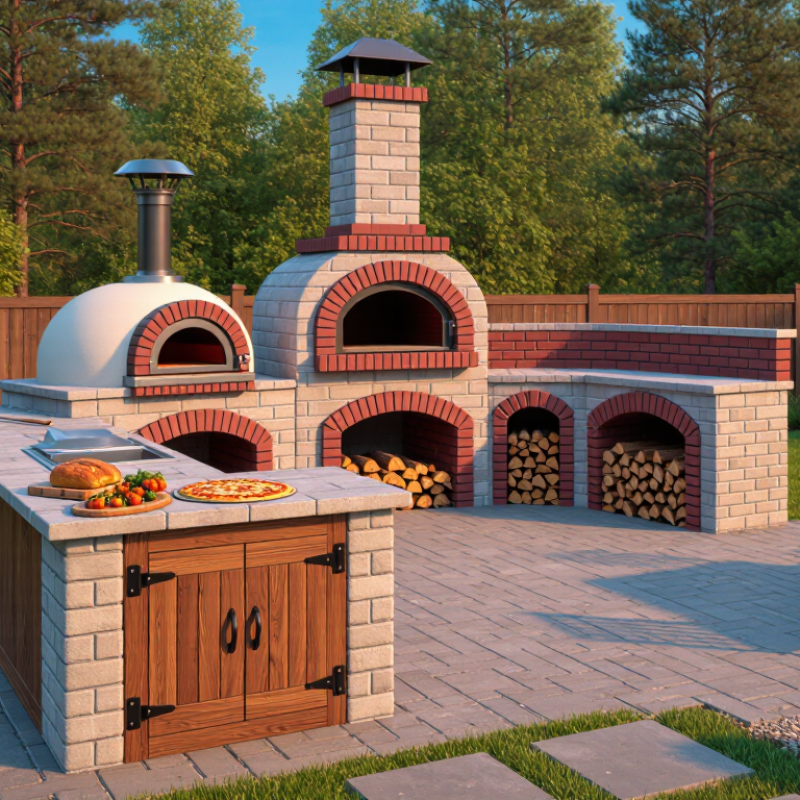
A backyard pizza oven fireplace combines two functions: baking food and creating a controlled outdoor flame. Unlike a simple fire pit, it has an enclosed cooking chamber, a heat-resistant floor, and a route for smoke. The fireplace section supplies warmth and visual comfort, while the oven section concentrates heat around the dough. That distinction matters.
In practical use, the fire heats the chamber before cooking begins. Heat stored in the masonry or refractory lining helps maintain a steady baking temperature. Once the oven floor is hot, a cook can move embers aside and place the pizza on the clear surface. The upper dome reflects heat downward, helping the crust brown while the topping cooks. A chimney or vent directs smoke away from the cooking area and nearby seating. Good airflow is essential.
From a design perspective, the fireplace should use durable, noncombustible materials and include stable clearances from walls, roofs, and furniture. Local installation rules still matter, even for a small backyard structure. In hands-on use, people often focus on flame appearance and underestimate temperature control. Easy mistake. Wood size, wind, insulation, and door position can change baking results quickly. A reliable design makes these variables easier to manage, but no oven behaves perfectly every time. Weather exposes weak planning.
A backyard pizza oven fireplace combines a cooking chamber with a small masonry fireplace. Its dome, hearth, insulation, flue, and door must work together. The dome is usually built from heat-resistant masonry. Its curved shape reflects heat toward the pizza, instead of letting warmth collect overhead. A low dome often heats quickly, while a taller dome may suit roasting and longer cooking.
The hearth is the cooking floor. It should stay level and transfer heat evenly to the dough. Refractory tiles or slabs are common choices because ordinary concrete can crack under intense heat. Beneath the hearth, insulation reduces heat loss into the supporting structure. This layer matters more than many beginners expect. A thick, continuous insulation blanket helps the floor remain hot between pizzas.
The flue guides smoke away from the opening and supports a steady draft. Its size and position affect how easily the fire breathes. Too much restriction can push smoke toward the user. The door controls airflow and heat retention. An open door helps the fire burn, while a fitted door supports baking after the flames settle. I would cure the oven gradually, with several small fires. Rushing this stage can trap moisture and cause cracks. I still inspect joints after the first few uses. Not every crack is dangerous, but ignoring movement is poor practice.
A backyard pizza oven fireplace combines a wood-fired cooking chamber with the atmosphere of an outdoor hearth. Its high heat is the main difference from a standard grill. When the cooking surface reaches 700–900°F, pizza dough cooks rapidly and develops a blistered edge. The floor stores heat, while the flame adds strong radiant energy across the top.
In my experience, reaching 800°F requires patience and properly seasoned wood. A small infrared thermometer helps confirm the floor temperature, but it cannot show every hot spot. I check several areas before launching the pizza. The center may be ready while the front remains cooler. That unevenness matters.
At 750–900°F, a thin pizza can bake in 60–90 seconds. Watch the crust, not only the clock. I rotate the pizza every 20 seconds because one side usually browns faster. The edge should puff quickly, with dark bubbles but no bitter black patches. My first attempts baked too aggressively because I trusted the thermometer alone. I still make that mistake when the fire looks impressive.
A fireplace-style oven also needs recovery time between pizzas. Adding too much wood can create harsh flames and scorch the toppings. Smaller pieces give better control. Thick dough, wet toppings, or crowded surfaces extend the baking time. Clean ash from the cooking floor before each session, and use heat-resistant tools near the chamber.
What Is a Backyard Pizza Oven Fireplace?
A backyard pizza oven fireplace combines a cooking chamber, hearth, chimney, and outdoor firebox. Its fuel system controls more than flavor. It affects heat-up time, temperature stability, operating cost, and emissions.
Wood creates intense radiant heat and a visible flame. Dry, seasoned wood burns more predictably. The U.S. Environmental Protection Agency recommends firewood below 20% moisture content for cleaner combustion (EPA Burn Wise). However, pizza ovens lose efficiency when damp logs, oversized fires, or frequent door opening interrupt airflow. The European Commission’s Ecodesign research reports seasonal efficiencies near 65% for some compliant solid-fuel heaters, but pizza ovens operate differently. That comparison needs caution.
Gas systems usually deliver steadier heat with less preparation. A built-in burner can hold a target temperature while reducing ash and smoke. Their real efficiency depends on insulation, burner adjustment, wind, and preheating habits. Hybrids offer both options. Gas can stabilize the floor temperature, while wood adds stronger flame character. They also introduce more parts to maintain. That is not always better.
Watch the flame.
A practical test uses an infrared thermometer, a stopwatch, and the same dough recipe. Record preheat time, fuel consumed, recovery after opening, and temperature across the stone. The U.S. Department of Energy stresses that rated efficiency and real-world performance can differ because installation and operating behavior matter. My own concern is simple: advertised efficiency rarely includes windy patios or repeated door opening. Venting, clearances, and chimney design should follow applicable fire-safety standards, including NFPA 211 guidance.
A backyard pizza oven fireplace combines an insulated high-temperature oven with a visible firebox or hearth. Wood systems add smoke flavor, gas systems provide fast and precise heat, and hybrid systems combine gas convenience with optional wood-fired cooking.
The chart shows representative operating ranges for thermal efficiency: the share of fuel energy transferred into useful oven heat. Actual performance varies with insulation, oven size, weather, fuel moisture, airflow, and cooking temperature. Hybrid ovens typically use gas for rapid preheating and wood for sustained high-heat cooking and flavor.
What Is a Backyard Pizza Oven Fireplace?
A backyard pizza oven fireplace combines a cooking chamber with a masonry-style firebox. It may burn wood or use another approved fuel. The structure belongs outdoors, but “outdoors” does not mean risk-free. A covered patio, shed, garage, or enclosed room can trap smoke and carbon monoxide. Never operate the oven in those spaces.
Clearance is the first design measurement. Keep the oven away from fences, timber walls, roof edges, furniture, and stored firewood. The required distances depend on construction, fuel type, and local fire regulations. Follow the oven manufacturer’s instructions and confirm them with the local building or fire authority. Noncombustible surfaces, such as concrete or masonry, reduce heat transfer. They do not make unsafe spacing acceptable. Heat can travel through hidden framing.
Ventilation needs a clear path upward. A properly designed chimney should release smoke above nearby openings and rooflines when required. Keep the flue free of grease, soot, leaves, and bird nests. A blocked flue can push smoke into the cooking area. That mistake is easy to miss. Carbon monoxide has no smell or visible warning. Install suitable carbon monoxide alarms in nearby enclosed areas, but never treat alarms as a replacement for ventilation. Keep children away from the firebox, provide a suitable extinguisher, and inspect cracks or loose joints before lighting the oven. My design would also leave extra clearance, because minimum measurements leave little room for error.
| Safety Dimension | Recommended Safety Target or Requirement | Why It Matters | Verification Method |
|---|---|---|---|
| Definition and Intended Use | A backyard pizza oven fireplace is an outdoor cooking appliance with a firebox or combustion chamber, an insulated baking chamber, and a chimney or flue for directing combustion gases outdoors. | It combines high-temperature cooking with open-flame and hot-surface hazards. | Identify the fuel type, appliance listing, installation instructions, and whether the unit is permanent or portable. |
| Placement | Install outdoors in an open-air location. Do not operate in a garage, shed, enclosed patio, tent, vehicle, or other partially enclosed area unless the appliance and local authority specifically permit it. | Combustion gases can accumulate rapidly in enclosed or poorly ventilated spaces. | Confirm that the installation has unrestricted airflow on all sides and that the flue outlet is not beneath an overhead enclosure. |
| Clearance from Combustible Materials | Use the appliance manufacturer’s listed clearance as the controlling minimum. If no certified installation distance is available, obtain written guidance from the local building or fire authority before installation. | Wood siding, fences, pergolas, awnings, dry vegetation, and outdoor furniture can ignite from radiant heat, sparks, or embers. | Measure horizontally and vertically from the oven, chimney, flue outlet, and any exposed hot surface to nearby combustibles. |
| Noncombustible Base | Place the oven on a stable, level, noncombustible surface such as concrete, masonry, or a listed heat-resistant base. Protect combustible decking from heat transfer according to the installation instructions. | The oven can be heavy, produce intense heat, and release burning embers below the cooking chamber. | Check the base for cracks, movement, inadequate load capacity, and heat damage before every season of use. |
| Chimney and Flue Routing | Use only flue components approved for the appliance and fuel. Keep the flue vertical where possible, support it securely, and terminate it where smoke and combustion products cannot enter buildings. | Poor draft can cause smoke leakage, flame instability, soot accumulation, and carbon monoxide exposure. | Inspect joints, supports, weather protection, and the outlet for obstructions, corrosion, or combustible material nearby. |
| Ventilation | Provide continuous natural ventilation in the operating area. Never block the appliance air inlets, combustion openings, chimney, or flue outlet. | Combustion requires oxygen, while blocked airflow can increase smoke and carbon monoxide production. | Observe the flame and smoke path during startup; abnormal smoke discharge or weak draft requires immediate shutdown. |
| Carbon Monoxide Control | Operate only outdoors as specified. Install carbon monoxide alarms inside adjacent occupied buildings, particularly near sleeping areas, in accordance with local requirements; alarms do not make indoor operation safe. | Carbon monoxide is colorless and odorless and may cause headache, dizziness, nausea, confusion, unconsciousness, or death. | Test alarms regularly, replace batteries as required, and evacuate immediately if an alarm sounds or symptoms occur. |
| Fuel Selection and Storage | Use only the fuel specified for the appliance. Store firewood, pellets, gas cylinders, and ignition materials away from heat sources and protected from accidental impact. | Incorrect fuel can cause excessive heat, flare-ups, toxic emissions, or equipment failure. | Check labels, hoses, regulators, valves, seals, and storage locations for damage, leakage, or deterioration. |
| Gas-Fired Appliance Checks | Inspect the gas connection before use. If gas odor is detected, do not ignite the appliance, operate electrical switches, or use an open flame; shut off the supply if safe and leave the area. | Leaking fuel can cause fire, explosion, or carbon monoxide from incomplete combustion. | Use an approved leak-detection solution on accessible connections; never test for leaks with a flame. |
| Wood and Solid-Fuel Management | Use dry, untreated cooking wood or the specified solid fuel. Do not burn painted, pressure-treated, glued, or chemically treated wood. | Treated or contaminated materials can release harmful pollutants and increase residue inside the flue. | Keep fuel dry and remove ash only after it is fully cold; place ash in a covered, noncombustible container. |
| Fire Extinguishing Equipment | Keep a suitable multipurpose fire extinguisher readily accessible. For grease or cooking-oil fires, never use water; use the correct extinguishing method for the fuel involved. | A nearby extinguisher can limit a small fire before it spreads to structures or vegetation. | Check the pressure indicator, access path, inspection date, and suitability for the expected fire class. |
| Weather and Vegetation | Do not operate during strong winds, drought restrictions, red-flag conditions, or when dry vegetation is close to the appliance. Follow local burn restrictions. | Wind can carry sparks and embers well beyond the cooking area. | Check local fire-weather notices and clear leaves, mulch, dry grass, and other combustible debris from the area. |
| Supervision and Access | Keep children and pets away from the hot oven, door, chimney, tools, and fuel. Never leave a burning appliance unattended. | Exterior surfaces and embers can remain dangerously hot after cooking ends. | Use a physical barrier where appropriate and establish a clearly marked operating zone. |
| Shutdown Procedure | For gas units, turn off the appliance and fuel supply as directed. For solid fuel, allow the fire and ash to cool completely; do not seal or move hot ash into a combustible container. | Residual heat and embers can ignite materials hours after cooking has finished. | Confirm that flames are out, fuel is isolated where applicable, and nearby surfaces are no longer releasing heat or smoke. |
| Inspection and Local Approval | Follow the appliance installation manual, local building and fire codes, property rules, and any permit requirements. Local authorities may impose stricter clearance, chimney, or fuel-storage rules. | Safety requirements differ by fuel type, construction, location, and whether the oven is portable or permanently installed. | Obtain approval from the relevant building or fire authority before construction, connection to fuel, or permanent installation. |